TheRaspberry Pi 5is the fastest Pi yet. But what if I told you there was a quick, easy and relatively inexpensive way to make it even faster? Well, you can supercharge a Raspberry Pi 5 by overclocking it and rigging it up with a superfast SSD instead of using a microSD card to run the operating system from.
I recently went through the process on my Pi 5, and because I’m not one to keep such secrets to myself, I documented the process and have given you a step-by-step guide for how to speed up your own Raspberry Pi 5. Don’t worry, either, because Raspberry Pi OS actually makes it quite simple to squeeze more performance out of your Pi. Read on to find out how.

Raspberry Pi 5 vs 4: Is newer better?
After testing, we put these two tiny computers head-to-head to see which one comes out on top.
Why speed up your Raspberry Pi 5?
In myRaspberry Pi 5 reviewand comparison of the Raspberry Pi 5 vs 4, I contended that the Pi 5 is a great desktop PC in its own right and can serve as a cheap home desktop replacement. Its upgraded hardware makes it snappy enough for pretty much any everyday task. The question is: If it’s already fast enough to serve as a desktop PC, why speed it up?
By speeding up your Raspberry Pi 5, you may squeeze out some extra snappiness for more CPU or I/O-intensive workloads and improve your boot and app load times.
The simple answer is that a little extra performance never hurts. And by speeding up your Raspberry Pi 5, you can squeeze out some extra snappiness for more CPU or I/O-intensive workloads and improve your boot and app load times. Plus, setting aside general overclocking and focusing just on the storage upgrade we’ll be undertaking, there are other benefits of installing an SSD for use with your Pi than straight-up performance.
While SD cards are cheap and portable, they’re prone to data corruption. SSDs are less so, and while a USB SSD resolves this problem to some extent, NVMe SSDs are faster and more reliable than USB ones.

How much performance will you gain?
It’s a respectable jump
How much performance you’ll gain and how much quicker your Raspberry Pi 5 will be after installing an SSD and overclocking the Pi’s chip depends on several factors (the SSD you choose, how much you overclock your chip, and, to an extent, the silicone lottery).
I can, however, tell you how much my performance increased after speeding up my Pi.

Improvement
GeekBench 6
15% overall performance

MotionMark
13% (GPU performance)
VSCode app loading time
1 second faster (5s to 4s)
USB file transfer
34% faster
File compression
35% faster
Startup boot time
2 seconds faster (20s to 18s)
It’s a testament to the Raspberry Pi 5 and Raspberry Pi OS that the general desktop experience was already snappy before making any changes, but after installing an SSD and overclocking the CPU and GPU, I felt things became slightly snappier – opening apps, switching between them, navigating the file explorer, and so on.
9 tips I wish I knew before starting my first Raspberry Pi project
Find your new Raspberry Pi daunting? These tips should have your Raspberry Pi projects up and running in no time.
What you’ll need
Extra hardware, of course
If you just want to overclock your Raspberry Pi 5 and don’t want to install an SSD, you’ll just need an active cooler, but if you want to hook an SSD up to your Pi you’ll need the following:
How to use an SSD with your Raspberry Pi 5
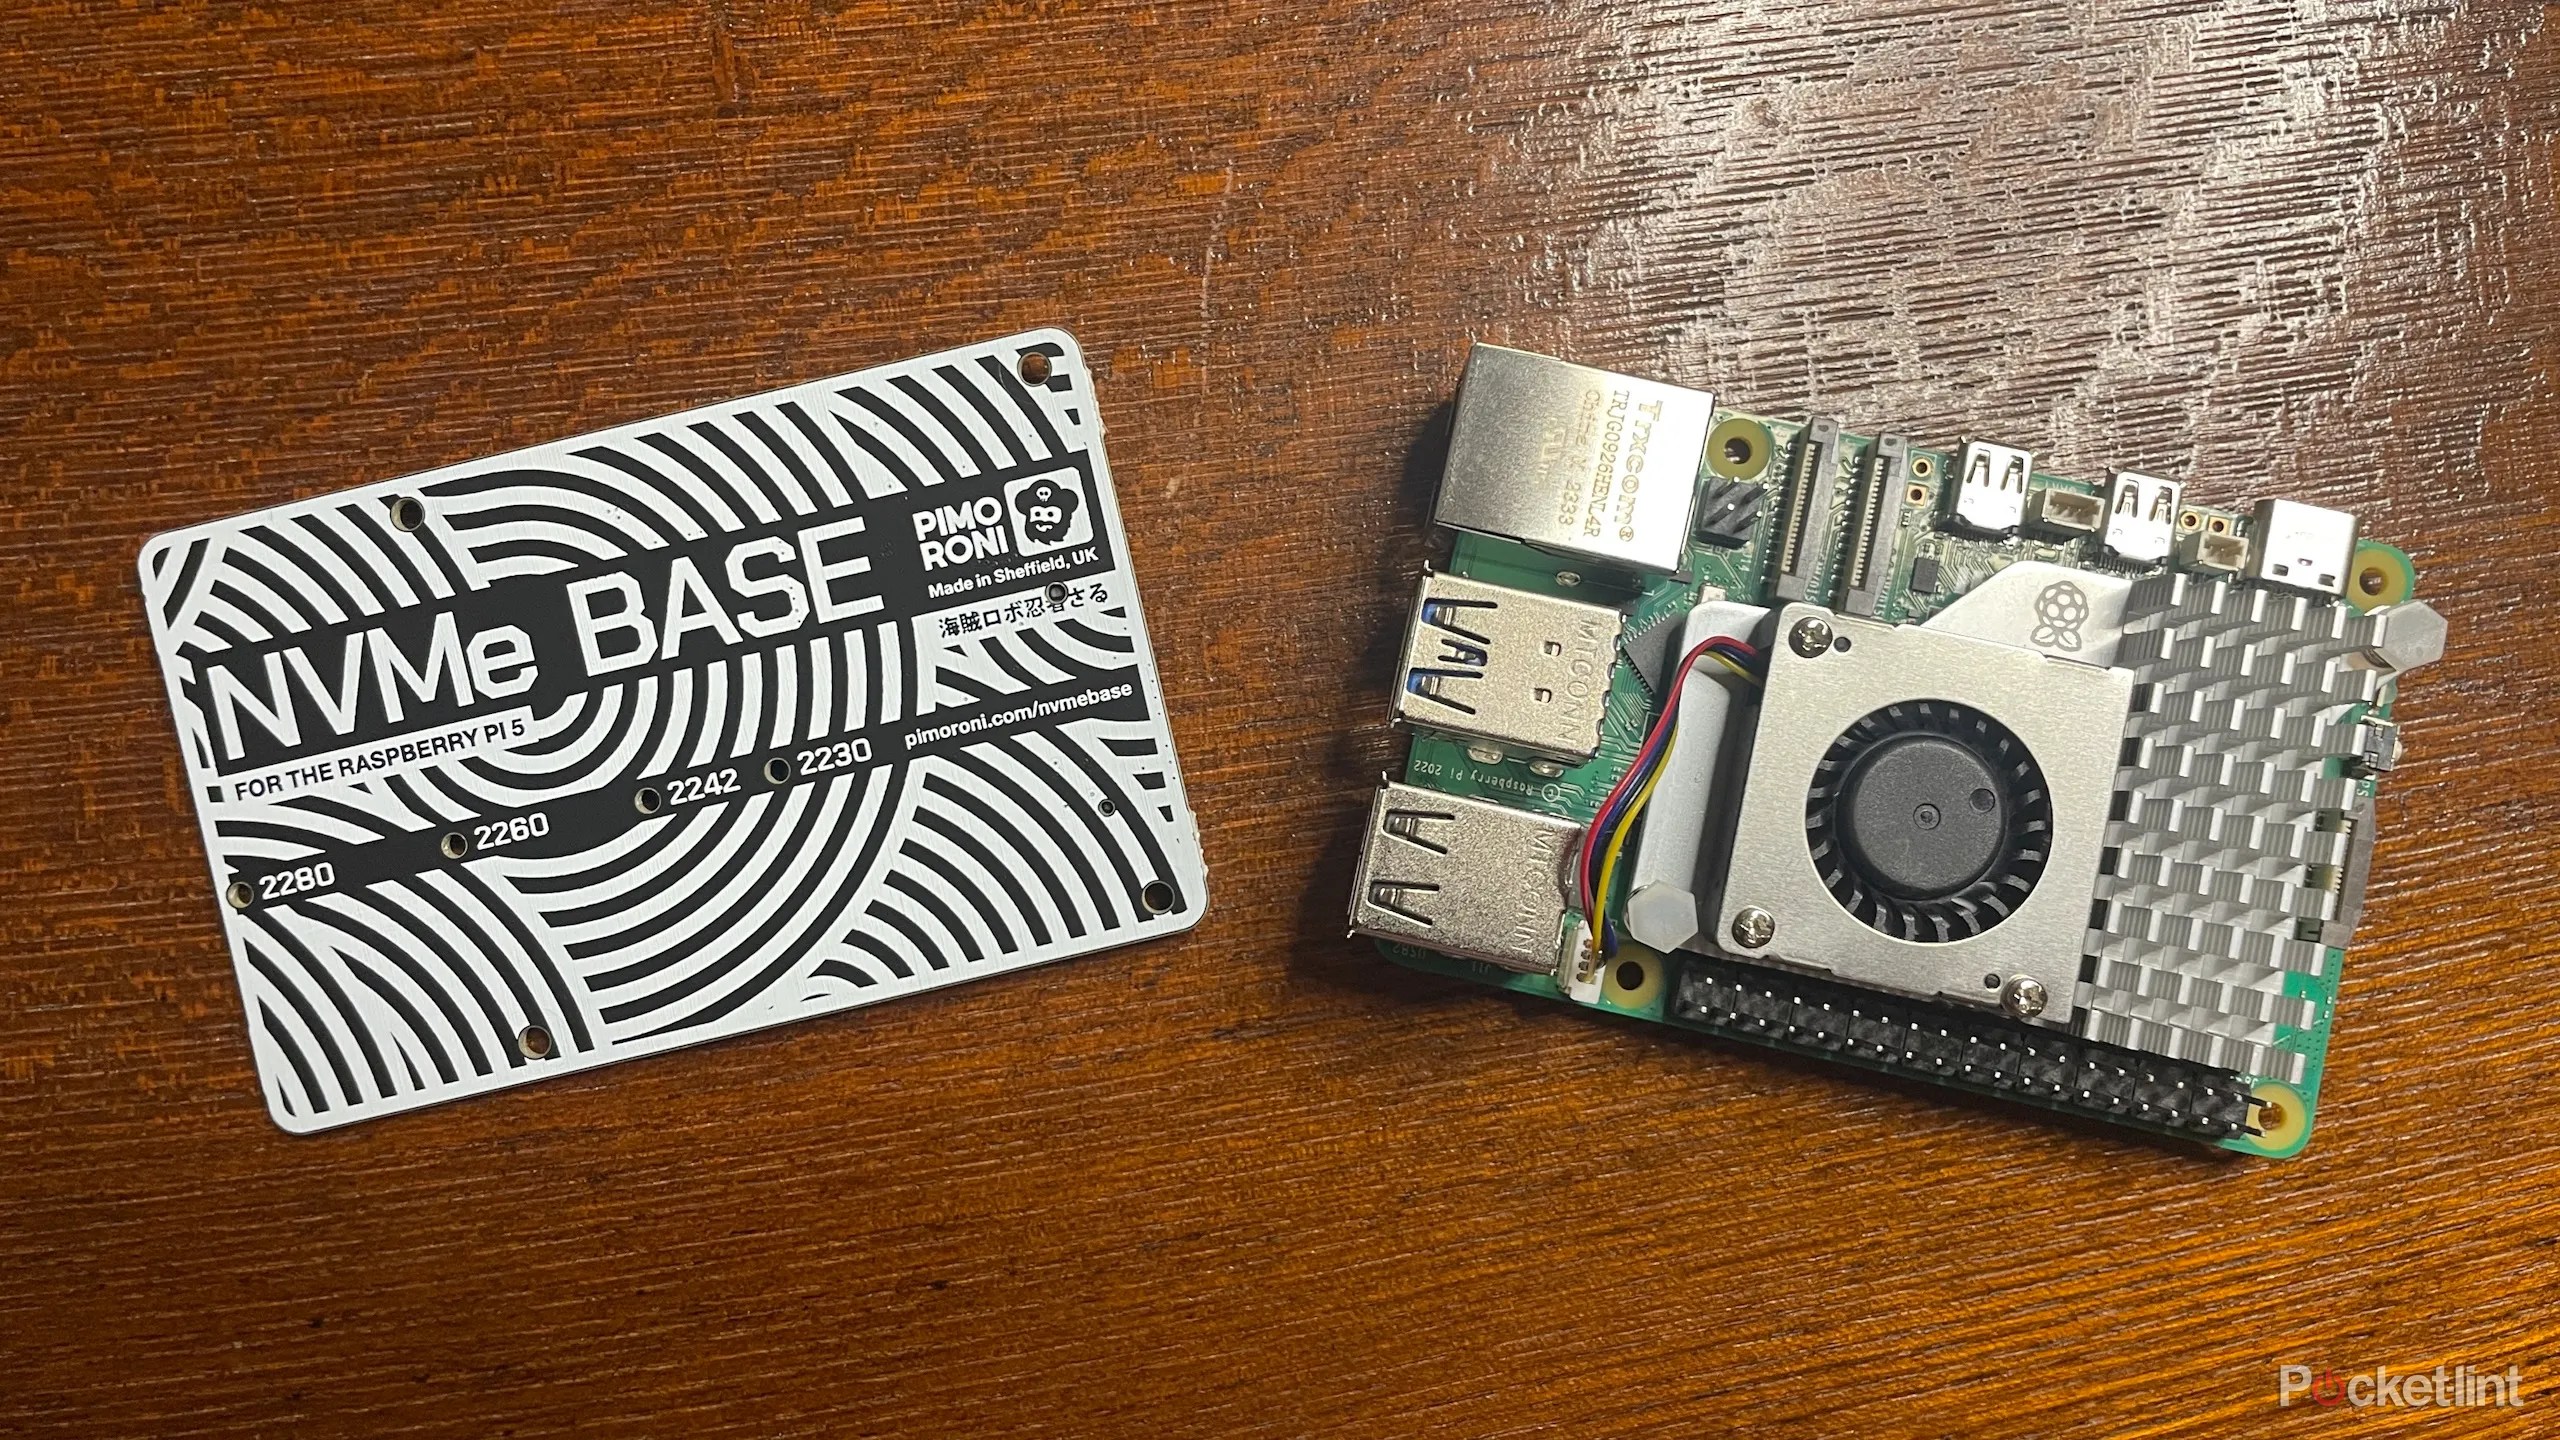
Installing an SSD using the Pimoroni NVMe base requires a bit of software preparation and then some pretty simple connecting and screwing in. First, you must get the Pi ready to boot from an NVMe SSD, then you can physically install the SSD.
Software installation
If you don’t have Raspberry Pi OS already installed on an SD card, download and install theRaspberry Pi Imager, connect a spare SD card to your PC with an SD-to-USB adapter, and install Raspberry Pi OS onto the SD card using the Imager.
There’s no option to install an NVMe bootloader Image onto an SD card via the Raspberry Pi Imager, so you’ll need to install and run Raspberry Pi OS on the SD card to set NVMe as the first boot device in the bootloader.
Plug the SD card into your Raspberry Pi, boot up, and do the following:
Alternatively, you can edit the boot configuration file to do the same thing:
Before you assemble the NVMe Base, you’ll need to flash Pi OS onto your SSD.
If you have an NVME-to-USB adapter or NVME USB enclosure, use that to connect the drive to your computer. Then, use the Raspberry Pi Imager to install Raspberry Pi OS onto your NVMe SSD. Make sure you select Raspberry Pi 5 from the list of options, followed by Pi OS 64-bit.
If you don’t have an adapter, install the SSD using the steps below but leave the SD card plugged into your Pi. Then download and boot up the Raspberry Pi Imager from within the Raspberry Pi OS and install Raspberry Pi OS onto your NVMe SSD. Finally, turn off your Pi, remove the SD card, and boot up.
Hardware installation
After you’ve installed Pi OS on your SSD, and made changes to the boot configuration, it’s time to put the entire assembly together and start running your Pi 5 from an SSD.
If you haven’t installed the active cooler onto your Raspberry Pi yet, do so, otherwise your performance will be throttled by high temperatures.
For a more detailed guide on how to set up your Raspberry Pi 5 with an SSD using the Pimoroni NVMe Base, check outPimoroni’s guide. Here’s the shortened version:
Once you’re done, be careful not to nudge the ribbon cable too much, as it could come loose or snap.
If you’ve installed everything correctly and set up the Pi to boot from an NVMe drive, it should now boot into the Raspberry Pi OS installed on your SSD.
How to overclock your Raspberry Pi 5
It’s super easy to overclock your Raspberry Pi 5 – easier than using most computers and operating systems, in fact. All you need to do is add a few commands to a configuration file.
The Raspberry Pi 5 should now have the configuration file located at/boot/firmware/config.txt. Other guides referring to /boot/config.txt are outdated.
The overclocked CPU and GPU numbers I picked are, in fact, a little conservative, but they’re what I achieved the above performance results with. Other users have had success with, for example, setting the CPU frequency to 2900MHz or 3000MHz and the GPU frequency to 1000MHz.
Your mileage may vary based on how lucky you were in the silicone lottery (how powerful of a chip was plucked from the batch) – you may be able to achieve a higher overclock than the conservative one I recommended here.
You might want to try outarm_freq=2900andgpu_freq=950and see how your Raspberry Pi performs.
5 beginner DIY projects for the new Raspberry Pi 5
The Raspberry Pi 5 is snappier than ever. Here are some exciting, DIY projects any novice can do with it.
